DIY - Turn a Water Fountain into a Planter
This year, I added a new feature to my patio garden. I got a really cool water fountain that didn't work properly from a sample sale at work. Instead of using it as a birdbath or leaving it empty, I saw potential. It would make an amazing planter instead!

1. Seal/glue together any parts you’re worried will fall off. The top tier didn't survive the trip from the office to my car and fell off. No worries though! I glued to the middle tier to make sure they didn’t fall apart during bad weather, or if a critter happens to knock it around (we have a bit of a pesky raccoon problem over here.) I used Gorilla Glue, but you can use a waterproof caulk or e6000 craft adhesive. You want something that will hold plastic/resin together and be water resistant.

2. Drill drainage holes (not pictured.) If you’re not going to use your fountain as a fountain ever again, I recommend drilling a few drainage holes to allow excess rain/water to escape. The fountain isn’t very deep but I don’t want my plant’s roots to sit in water and rot.
3. Now comes the fun part: choose your plants. I chose plants my in two ways. First, I chose a color scheme. I wanted to have purple, yellow and green plants and foliage. Then, I looked for plants in those colors that follow the "thriller, filler and spiller" planting technique.
Thriller plants adds height and drama. It can be a flowering plant, foliage, or ornamental grasses.
Filler plants are plants that fill out the planter and make it look full.
Spiller plants are trailing plants that hang over the edge of the container.
4. Add dirt and plant. Take a few moments and place your new plants in your planter and make sure you like their positioning. Once you're happy with how the plants are layed out, go ahead and move them (carefully as to remember where they go) and add dirt and plant!
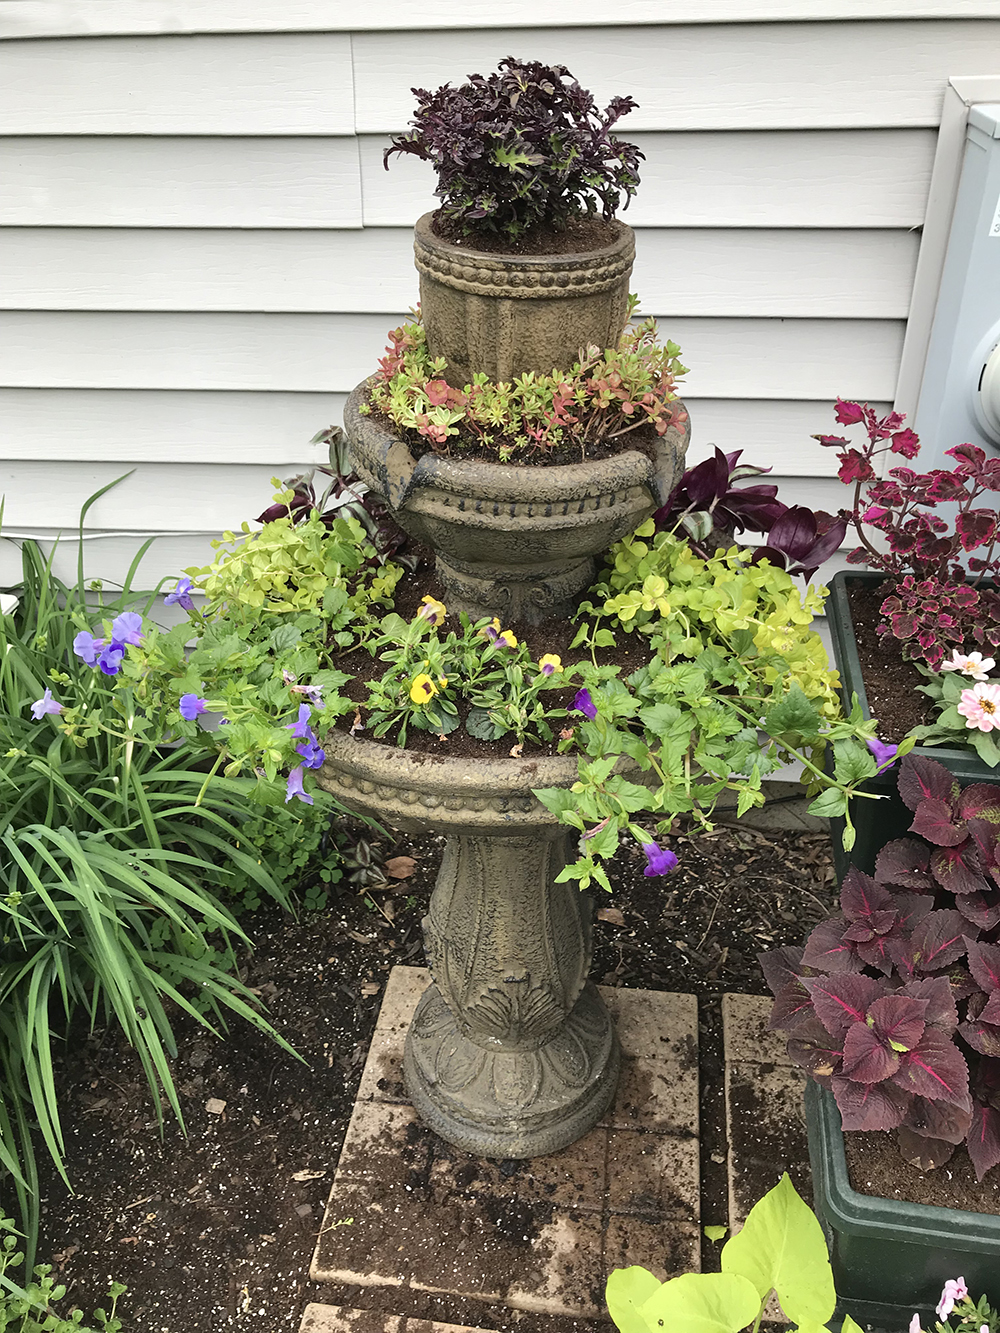
Just planted!
Voila! You now have an amazing looking garden feature!
WHAT I PLANTED:

I planted the gorgeous "Inky Fingers" coleus in the topmost section of my fountain planter. It features fun shaped leaves in vibrant shades of purple and green. This is definitely my thriller plant.

For the the middle section, I used a sedum ground cover mat. I cut strips of the plant mat into sections that would fit in the small space. I chose the sedum mat because it doesn't require a ton of dirt (which is fortunate because that section is pretty shallow) and they are super hardy perennial plant.

For the bottom section, I planted some fillers and spillers. I was going to use more mini petunias since I'm obsessed with them, but my mom found this really pretty plant called Torenia, or the Wishbone Flower. The flowers are so unique looking AND they attract hummingbirds. I was sold. I picked up "Summer Wave Large Blue", "Summer Wave Large Violet" and "Gilded Grape." These plants fulfill both the filler and the spiller category as they will fill out the planter and trail off. For my spillers I used a yellowish Creeping Jenny and Tradescantia zebrina, which features green leaves with a purple stripe and purpleish undersides.
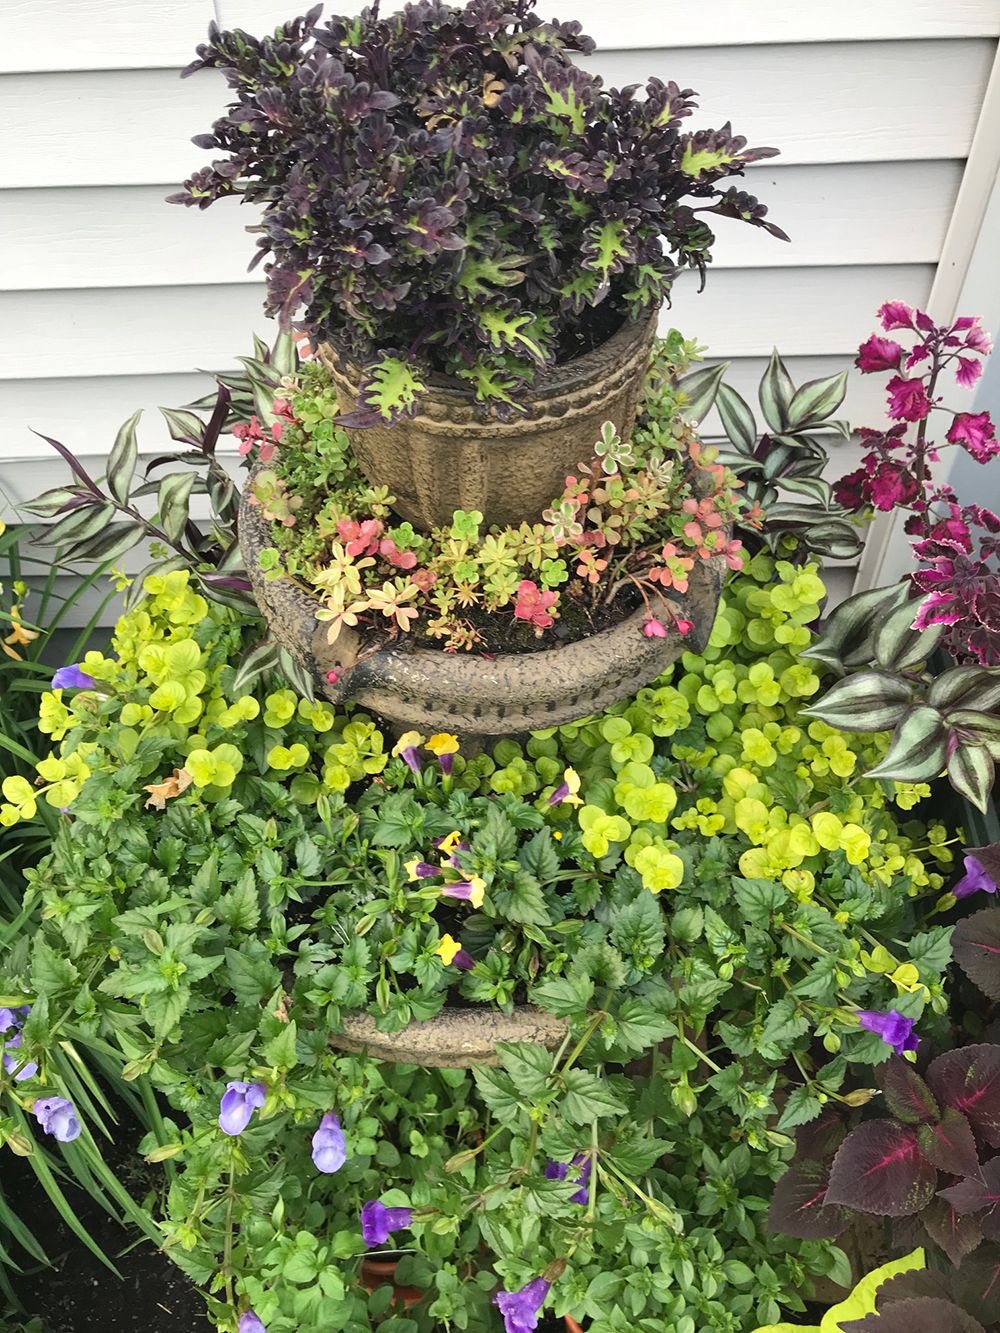
Here we are! A few weeks after planting and everything is filling in quite nicely.

Have you tried to turn a water fountain into a planter? How did it turn out? Let me know in the comment section below. I'd love to see your garden masterpiece!
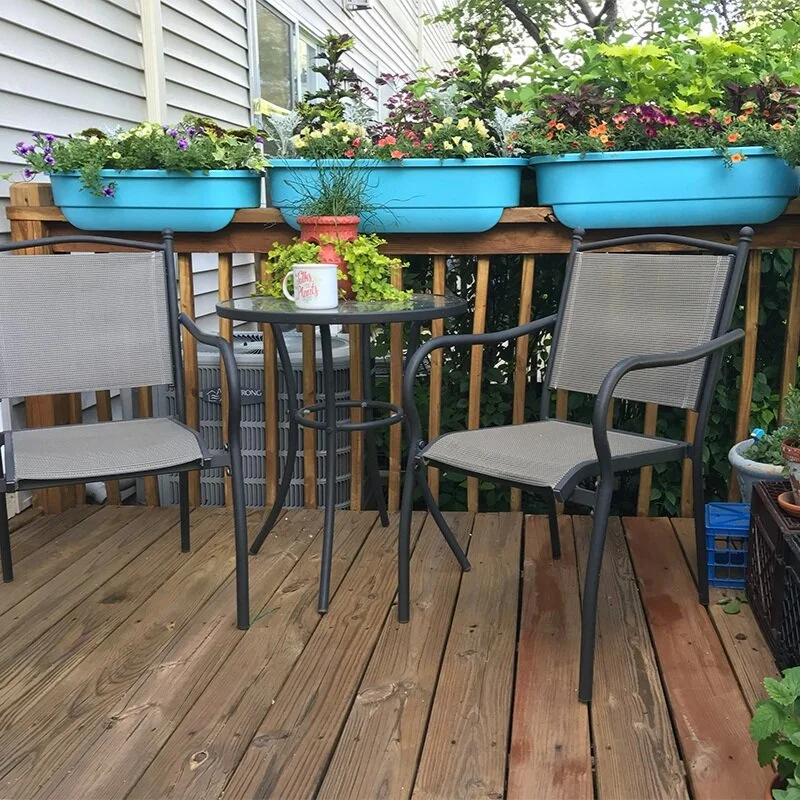
If you'd like to see more of my tiny patio garden, please check out my Patio Garden Tour, Part 1.
If you're looking for even more ways to DIY your flower pots, check out these posts about 10 DIY Flower Pot Painting Ideas and 10 MORE DIY Flower Pot Painting Ideas, and my newest collection of 10 Super Cute Ways to DIY succulent planters. I'm sure you'll find something you'll love!
Happy planting!
-a
Related posts: